Software localization
Localizing Xcode Applications with XLIFF

Short note: This article covers iOS SDK 8.1 developed in Xcode 6.1. Other versions should work fine, too.
Your Basic Setup
Localization in Xcode can be done easily with the Strings format. Before we dig any deeper you should check out the documentation on iOS with Phrase setup. With the XLIFF format you now have the possibility to group your .strings files into larger XLIFF language files. For example, all your .strings for English will be put into a singleen.xliff file. No more cluttered .strings files in your project!
Sample XLIFF file:
<?xml version="1.0" encoding="UTF-8"?>

<xliff version="1.2">

  <file original="" source-language="en" target-language="de">

    <body>

      <trans-unit id="translation_key" xml:space="preserve">

        <source xml:lang="en">My Awesome Project</source>

        <target xml:lang="de">Mein großartiges Projekt</target>

      </trans-unit>

    </body>

  </file>

</xliff>
Workflow
The localization workflow itself is different to the usual Strings workflow:
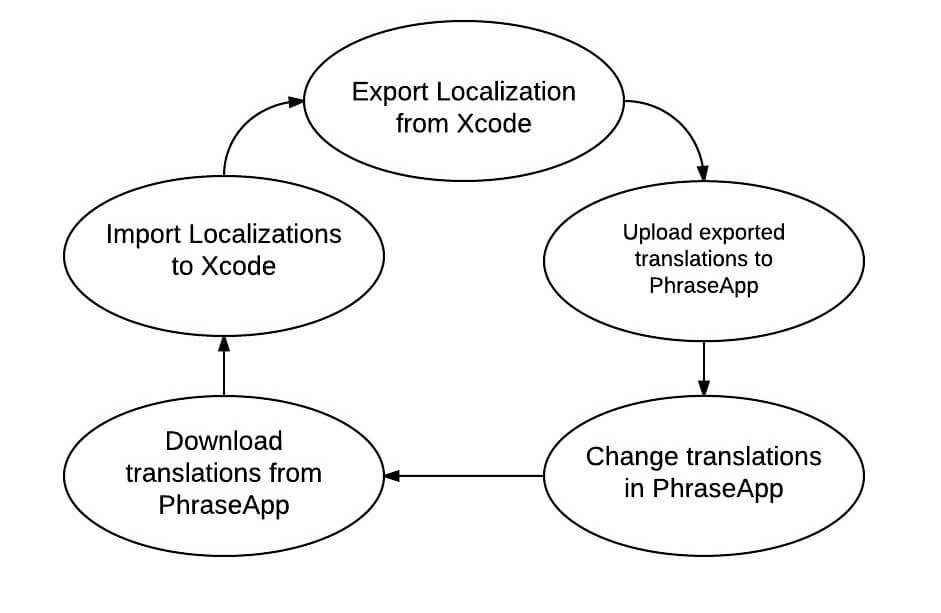
Export your localization files by clicking on your project. Then Editor > Export For Localization. Within this folder all your translations reside as a .xliff file. It is best to upload and download your files to and from Phrase from this folder. Import your localization files by clicking on your project. Then Editor > Import Localizations. Let’s say you exported your files from the Xcode project and uploaded some translations to Phrase. If you have new translations download them to your translation export folder. Then just import the translations back into your application by using Xcode’s import feature.
Pluralization
Unfortunately XLIFF does not support pluralization. For that reason Xcode uses the Stringsdict format. If you want to pluralize your app you will need to work with the two formats simultaneously. You can still work with XLIFF as suggested before.
Additionally you will need to set up Phrase for the .stringsdict files as well.
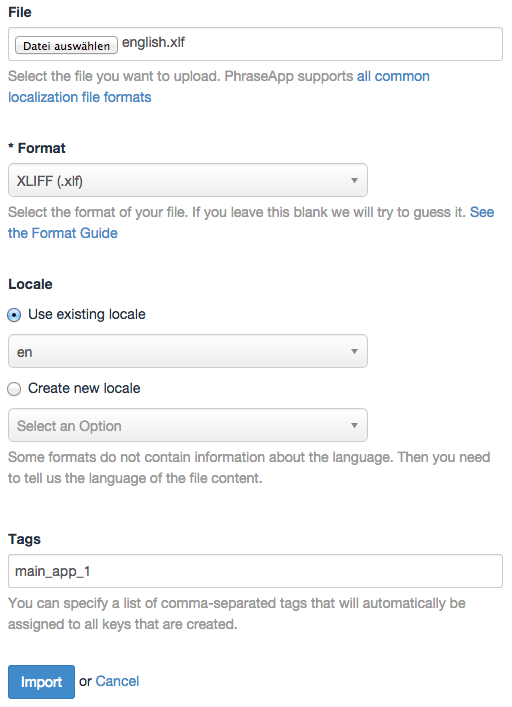
Uploading Your Translations To Phrase
Uploading your files to Phrase leaves you open with two options. The first one is via the translation center:
The second one is for your developers by using the command-line client.
If you want to upload a specific XLIFF file for example English (en) simply type
phrase push app_translations/en.xliff --locale=en --format=xliff --secret=PROJECT_AUTH_TOKEN
If you would like to download your translations for English simply type
phrase pull en --format=xliff --secret=PROJECT_AUTH_TOKEN
Next Steps
With a working Phrase setup your application is good to go. You can start the translation process by managing your keys in the translation center, ordering translations or by collaborating with your translators and developers.
Further Reading
- Phrase Official Site
- Phrase on Github
- IOS with Phrase setup
- XML Localization Interchange File Format (XLIFF)
- Official Apple Localization Documentation
- Photo by Kārlis Dambrāns (CC)*
Last updated on October 28, 2022.


